Step 1: Access the RecRam Dashboard
Log into your RecRam account to access the main dashboard where you can manage all your forms and workspaces.

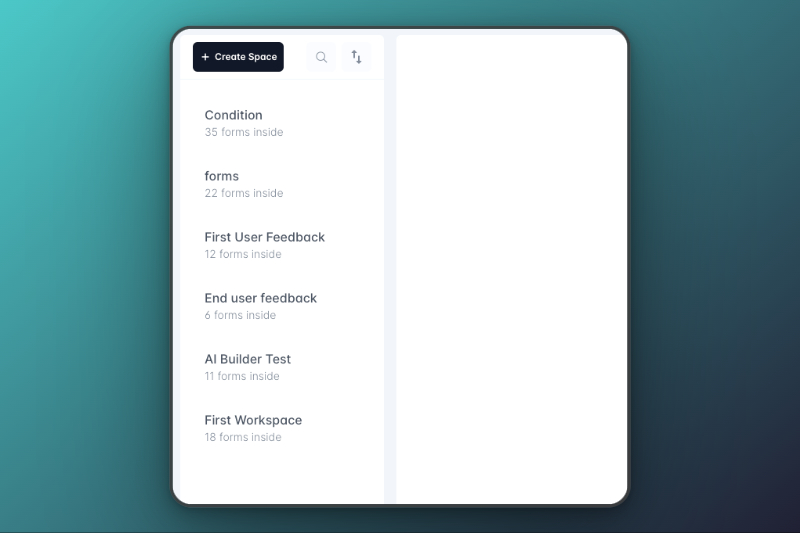
Step 2: Create a Workspace
Click on the Create Space button located on the left-side menu. A modal will appear, prompting you to enter a name for the new workspace. This workspace will act as a container for your forms, organized by topic.
Step 3: Create a New Form
Once inside the desired workspace, click on the New Form button, typically located in the top right corner or within the workspace area. You’ll be prompted to choose between two options:

- Create Yourself: Start from scratch and manually design the form.
- Create with AI: Use AI to generate a form based on your provided prompt (e.g., “Develop a feedback form for Netflix customers”).

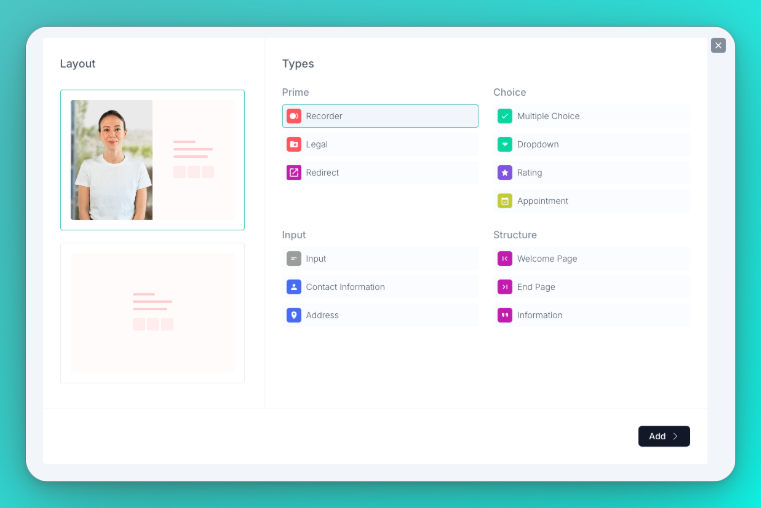
Step 4: Customize Form Pages
Each page of your form can be customized. Start with the Welcome Page, where you can add your company’s logo and an introductory message. This helps create a personalized experience right from the start.

Step 5: Add Videos and Media
To enhance your form, upload relevant videos to specific pages. Use the Upload option within the page settings to select and add video files. This allows you to create an engaging, media-rich form that keeps your users involved.

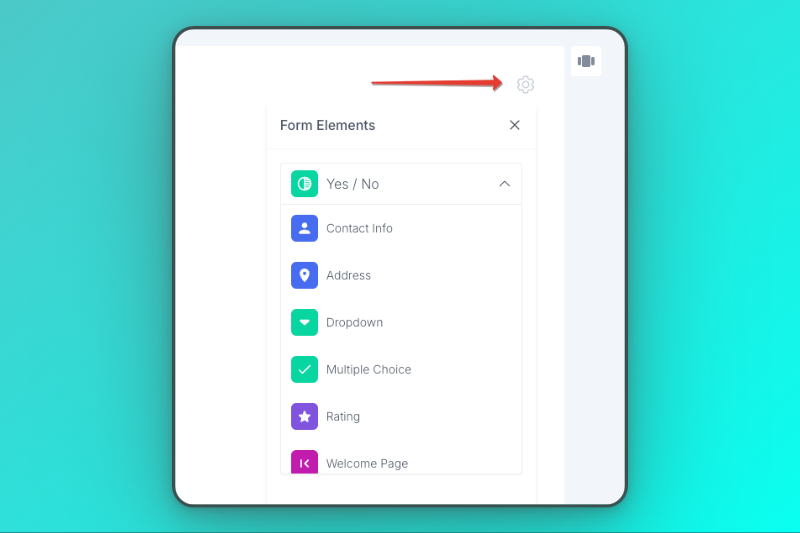
Step 6: Create Interactive Elements
Add multiple-choice questions, rating scales, NPS, and other interactive elements to capture specific feedback. Customize the questions and their options according to your needs.
Step 7: Add Various Question Types
Include a variety of question types such as:
- Rating scales
- NPS (Net Promoter Score)
- Contact information fields
These diverse question types help you gather detailed and actionable data from your users.
Step 8: Implement Conditional Logic
Set up Conditional Logic to guide users through the form based on their responses. This creates a more personalized and dynamic experience, ensuring users only see the questions that are relevant to them.

Step 9: Share and Embed Your Form
Once your form is ready, click the Update button. Then, use the share options to:
- Embed the form into your website.
- Share it via social media, QR code, or a direct link.
